Choosing an orthodontic treatment method is a crucial decision that impacts both health and aesthetics. Many people face issues like overbites, underbites, or crooked teeth and seek solutions. This article will explore everything about self-ligating braces — from their concept, advantages and disadvantages, actual costs, to factors affecting the price. In particular, you will also learn important notes when choosing self-ligating braces to achieve straight teeth and a radiant smile.
What are Self-Ligating Braces?
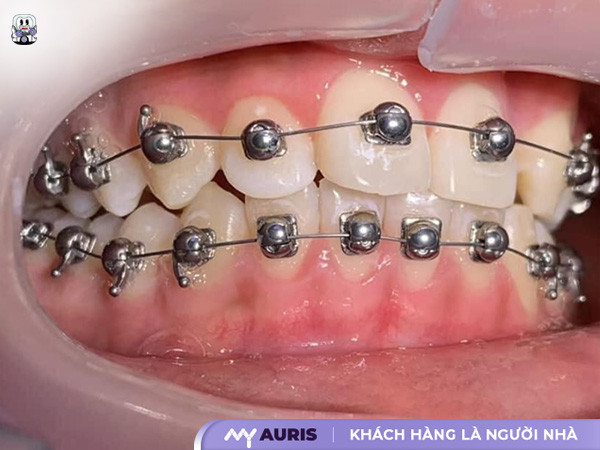
Self-ligating braces are an optimal orthodontic method with a modern design that prevents bulkiness and friction, providing comfort throughout the entire treatment process. Compared to traditional braces, this method offers a 30% faster treatment effectiveness.
The design of self-ligating braces stands out with a ladybug-shaped base and gently rounded edges, creating a subtle force on the teeth, allowing them to move to the desired position flexibly and precisely. Currently, self-ligating brackets are primarily made from two types of materials: ceramic brackets for high aesthetics and metal brackets for superior durability.
Why are Self-Ligating Braces Popular?
Are self-ligating braces effective? The straightforward answer is: Yes, this is a very good and highly effective method. However, for a comprehensive evaluation, we need to analyze it based on scientific criteria and practical experience.
Shortened Treatment Time: Clinical data shows that using self-ligating braces can shorten the total treatment time by 3 to 6 months compared to traditional braces. The reason is low friction. Without the obstruction of elastic ligatures, teeth can move more smoothly and continuously along the archwire’s guidance.
Effective for Complex Cases: For severe malocclusions such as overbites, underbites, or serious crossbites, this brace system maximizes its strength. The continuous gentle force is not only safe for oral health but also powerful enough to create significant and complex tooth movements.
Optimized Orthodontic Results: Self-ligating braces allow for precise control over the tilt and rotation of each tooth. Many modern self-ligating systems also integrate AI technology, enabling high customization for individual teeth. This helps dentists achieve not only perfectly aligned teeth but also a flawless bite.
Reduced Pain and Sensitivity: This is the biggest advantage: self-ligating braces, with their free-sliding mechanism, generate a gentle, physiological, and continuous force. The feeling of soreness and tension is significantly reduced, helping patients feel more comfortable in their daily lives.
Easier Oral Hygiene: The elastic ligatures of traditional braces are often where plaque and food easily get trapped, making cleaning difficult and increasing the risk of cavities and gum inflammation. Since self-ligating braces do not require elastic ligatures, their design is smoother and more compact. Brushing and using orthodontic tools like dental floss or water flossers become much simpler. This helps maintain good oral health throughout the bracing process.
Fewer Follow-up Visits: The self-ligating mechanism helps the archwire maintain stable force for a longer period. Therefore, the interval between follow-up appointments for the dentist to adjust the force can be extended, typically every 6-8 weeks instead of 3-4 weeks as with traditional braces. This is particularly convenient for busy individuals, those living far from a dental clinic, or international students, helping to save time and travel costs.

Disadvantages of Self-Ligating Braces
Requires High Skill
Orthodontic treatment with self-ligating braces requires extremely stringent techniques. The treating doctor must not only be a general dentist but also an orthodontist with extensive experience in self-ligating bracket systems.
Even a slight error in bracket placement can alter the entire treatment plan, extending the duration and failing to deliver the desired results. Therefore, investing in a skilled dentist is an investment in the success of the entire orthodontic process.
Aesthetic Limitations
Although self-ligating braces have a compact design and are much improved compared to traditional metal braces, they still have an undeniable drawback: aesthetic limitations.
Who is Suitable for Self-Ligating Braces?
Overbites, underbites: This brace system creates stable and continuous traction force, effectively shifting entire tooth segments and adjusting jaw structure.
Severely crooked, crowded teeth: The compact design and free-sliding mechanism of the archwire within the bracket slot help create space and align teeth into their correct positions on the dental arch faster than traditional metal braces.
Gapped teeth, large spaces: Self-ligating braces effectively close gaps, ensuring teeth move evenly and maintaining stable orthodontic results long-term.
Busy individuals: The self-locking mechanism helps maintain stable force for an extended period, reducing the number of follow-up visits needed to tighten the archwire. Instead of every 3-4 weeks like traditional braces, you may only need to visit the dental clinic every 6-8 weeks.
Individuals living far from a dental clinic: The extended interval between follow-up appointments helps save travel costs and time, which is a major advantage for orthodontic patients who do not live near a reputable dental practice.
Sensitive individuals, those afraid of pain, and those seeking a gentle orthodontic experience: The fear of pain is the biggest barrier when deciding on orthodontic treatment. Self-ligating braces thoroughly address this issue.
Children and adolescents in the golden age of orthodontics: At this age, the jawbone is still developing, allowing teeth to move faster and more easily. Using self-ligating braces not only shortens treatment time but also simplifies oral hygiene due to the absence of elastic ligatures, reducing the risk of cavities and gum inflammation in children.
Self-Ligating Braces Procedure
Step 1: Examination and Consultation
This is the foundational step, determining 50% of the entire orthodontic process’s success. This step is not just a regular meeting but an in-depth session between you and the orthodontist. The doctor will conduct a general oral health check-up, examining issues such as cavities, gum inflammation, and tartar. Next, you will be prescribed necessary X-rays, commonly panoramic and cephalometric films.
In this step, the dentist will also take impressions of your dental arches using plaster or an intraoral 3D scanner. These models, along with the X-rays, serve as the input data for analysis and planning.
Step 2: Develop a Detailed Treatment Plan
After collecting sufficient data in Step 1, the orthodontist will use specialized software for analysis. Modern technology, sometimes integrating AI, allows for the creation of a 3D treatment plan. This protocol is like a detailed map, outlining the movement path of each tooth throughout the bracing period. You will be shown a simulated video demonstrating how your teeth will change month by month and what the final result will look like.
Step 3: Sign the Orthodontic Treatment Contract
The core content of the contract must include: the chosen orthodontic method, specifically the self-ligating brace system; the total cost of treatment and payment methods; estimated treatment duration; number of follow-up visits; and commitments regarding the outcome. Pay special attention to items regarding additional costs, such as tooth extractions, treatment for existing conditions, or the cost of replacing lost or damaged appliances. Do not hesitate to ask the dental assistant or dentist to clarify any points you find unclear. Transparency from the beginning will help avoid any misunderstandings later on.
Step 4: General Treatment Before Bracing
This step ensures your oral health foundation is in the best possible condition. The dentist will perform scaling to remove plaque, which is the primary cause of gum inflammation. All decayed teeth will be filled to prevent further decay and pain as teeth shift.
In some cases, to create space for other teeth to move into their correct positions on the dental arch, the dentist may recommend extracting a few teeth. This is meticulously calculated in the treatment plan to ensure the harmony of the bite and facial aesthetics later on.
Step 5: Orthodontic Treatment
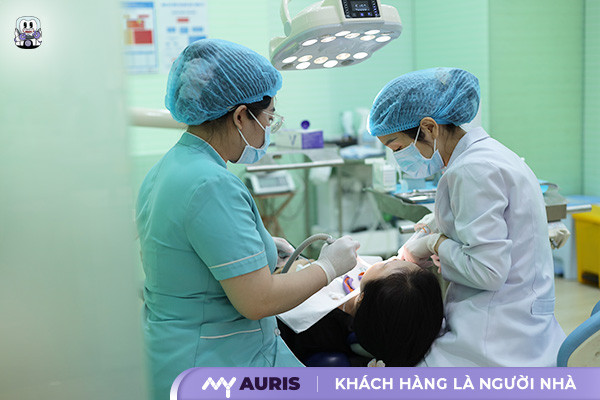
The dentist will proceed to bond the self-ligating braces onto the surface of each tooth. This process requires absolute meticulousness and precision, as the position of the brackets determines the direction of tooth movement.
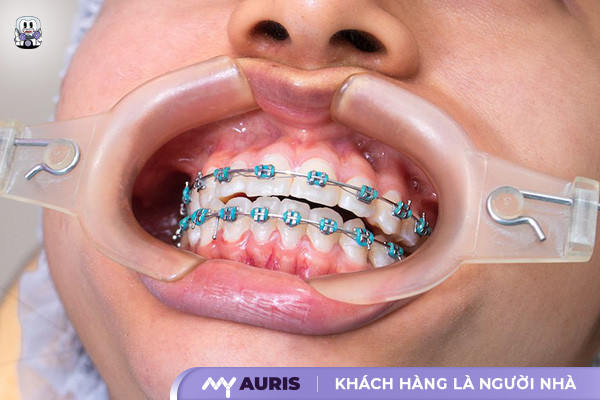
After the braces are bonded, you will need some time to get used to them. The initial feeling of discomfort or bulkiness is normal and will gradually subside after a few days. You will be instructed on how to care for your teeth while wearing braces and provided with orthodontic wax to reduce irritation. Periodically, approximately every 4-6 weeks, you will visit the dental clinic for follow-up appointments. During each visit, the dentist will check the tooth movement and adjust or replace the archwire to apply new forces for movement.
Step 6: Treatment Completion – Retention Phase
This is the retention phase, an extremely important step often underestimated by many. Teeth and jawbones need time to stabilize in their new positions. The dentist will take new impressions of your teeth to fabricate retainers. There are various types of retainers, which can be clear removable trays or fixed wires bonded to the inner surface of your teeth. You must strictly adhere to the dentist’s instructions regarding retainer wear time, usually 24/7 during the initial months, then gradually reducing to only wearing them at night. Skipping this step can render all the effort and treatment costs meaningless, as teeth tend to relapse to their original positions.
How Much Do Self-Ligating Braces Cost?
The cost of self-ligating braces is an important financial decision. It is a direct investment in your oral health and confidence. The price for this high-tech orthodontic method typically ranges from 45,000,000 VNĐ to 65,000,000 VNĐ for the entire treatment process.
6 Factors Affecting the Cost of Self-Ligating Braces
The price of braces is not fixed for everyone. The final cost is determined based on a personalized treatment plan. An orthodontist will evaluate the following six key factors to provide an accurate price for your case.
Degree of Tooth Misalignment
This is the biggest determining factor. The more complex your tooth condition, the higher the cost. A simple case with only mild crowding will require less time and fewer appliances. Conversely, complex cases such as severe overbites, underbites, extensive crowding, or deep malocclusions demand a more intricate treatment plan.
Oral Health Condition
Before bonding braces, your teeth must be in a healthy state. The dentist will perform a general check-up. If you have issues such as cavities, gingivitis, periodontitis, or tartar, you will need to completely treat these conditions. The cost of this general treatment is not included in the initial braces package.
Doctor’s Expertise
The skill and experience of the orthodontist directly affect both the outcome and the cost. A dentist with deep expertise in orthodontics, who has successfully completed many complex cases, will command a higher fee.
Material of Self-Ligating Brackets
Although all are self-ligating braces, different manufacturers may use varying materials and production technologies. Renowned brands from the US or Europe often come with higher costs due to investments in rigorous research, development, and clinical validation.
Customer Age
Age is a significant factor. Orthodontic treatment for children and adolescents is generally easier and faster. For adults, the jawbone has hardened and stabilized. The tooth movement process will be slower and potentially more complex, requiring more time and technique. Therefore, the cost of braces for adults is often slightly higher than for children.
Reputable Dental Clinic
The cost of braces at a reputable dental clinic will reflect the quality of service and facilities. A modern dental practice will invest in advanced equipment such as digital dental X-ray machines, 3D intraoral scanners, and treatment planning software. Choosing a trustworthy location will give you peace of mind throughout your journey to regain your smile.

Steps for Oral Care After Getting Self-Ligating Braces
Use a Soft-Bristle Toothbrush
How to do it:
- Position the toothbrush at a 45-degree angle to the gum line.
- Gently brush the part of the teeth above the archwire and brackets.
- Move the toothbrush downwards, continuing to brush the part of the teeth below the archwire.
- Clean the outer, inner, and chewing surfaces of all teeth. Use small circular motions, ensuring the bristles reach into every crevice.
- Do this after every meal, not just twice a day. This prevents food from forming plaque around the braces, ensuring the most effective orthodontic oral care.
Brush with Fluoride Toothpaste
How to do it:
- Choose any fluoride toothpaste recognized by reputable dental associations.
- Squeeze a pea-sized amount of toothpaste onto your brush.
- Brush your teeth using the technique described above for at least two minutes.
- After brushing, spit out the excess foam but do not rinse your mouth immediately with water. This allows the fluoride more time to contact and strengthen your tooth enamel. This is a small tip that provides significant protective benefits, recommended by many dentists and orthodontists.
Use Dental Floss
How to do it:
- Use a floss threader, a simple orthodontic tool. Thread about 45cm of floss through the loop of the threader.
- Gently guide the pointed end of the threader through the space beneath the archwire.
- Pull the floss through until you can grasp both ends. Remove the threader.
- Wrap the floss around your two index fingers. Carefully curve the floss into a C-shape around one side of the tooth. Move the floss gently up and down from the gum line to the biting edge.
- Repeat for the adjacent side of the next tooth.
- Remove the floss and move to the next interdental space. This process helps remove plaque missed by brushing, preventing gum disease and interproximal cavities.
Supplement with Mouthwash
How to do it:
- Choose a fluoride-containing and alcohol-free mouthwash. Alcohol-based mouthwashes can cause dry mouth and gum irritation.
- After brushing and flossing, rinse your mouth with approximately 15-20ml of the solution for 30-60 seconds.
- Spit it out and avoid eating or drinking for the next 30 minutes to maximize the fluoride’s effect. Consult your orthodontist at your dental clinic for advice on the most suitable type for your current oral condition.
Use a Water Flosser
How to do it:
- Fill the reservoir of the device with warm water.
- Start with the lowest pressure setting and gradually increase it until you feel comfortable.
- Direct the flosser tip at the gum line at a 90-degree angle.
- Turn on the device and move the tip along the gum line, pausing briefly at each interdental space and around each bracket. This cleaning mechanism helps massage the gums, reduce inflammation, and clean more effectively.
Regular Follow-up Appointments
Always remember and attend your scheduled appointments set by the reputable orthodontic clinic. Immediately inform the dental assistant or dentist if you encounter any issues such as a loose bracket, a dislodged archwire, or unusual pain. Utilize your appointments to ask the dentist about any questions you have regarding home oral care. Close cooperation between you and the dental team is key to achieving perfectly aligned teeth and a correct bite from misaligned ones.